SEO for Growth – The Complete 2026 Guide
More traffic isn’t your problem. See How We’d Grow Your Business → Get a Free SEO Strategy Call After 20+ years and hundreds of SEO


Make sure you have yoast installed and your inital wordpress SEO-Friendly Configuration is finished.
On your WordPress Admin Panel’s sidebar, click “Yoast SEO” and select “Settings”

Under “Site Features” Near the bottom, enable the “XML Sitemap”: Usually By Default but double check!
View your website sitemap that yoast created:

By Default “yoast” Will set Post/Page and Catagory and Author Active in your inital sitemap it generates.
Exclude Blog Categories: Click “Categories” Under Categories & tags section. Switch to “Off“. Save button will pop up Click Save.

Next: If you don’t have more then one author for the blog posts then turn off “Author archives”

What your sitemap should look like if it’s a single author website when finished!

Start by going to “Settings” then scroll to the bottom and there’s a ghost button labeled “Open Sitemap“

In the url copy the sitemap slug and Paste it into the sitemap field in Search Console and Then Press Submit!
Your all done.

More traffic isn’t your problem. See How We’d Grow Your Business → Get a Free SEO Strategy Call After 20+ years and hundreds of SEO
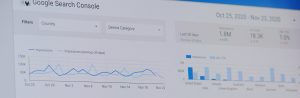
Setting up Google Search Console for the first time and seamlessly connecting it with the Yoast SEO WordPress plugin is a pivotal step in proactively

Ensuring an effective sitemap setup is a crucial step in enhancing your website’s visibility on search engines.

Yoast SEO for WordPress is a popular plugin designed to help website owners optimize their content for search engines. It’s a tool that assists in improving the on-page SEO (Search Engine Optimization) of a WordPress website or blog.